iPhone e-mail Setup
The iPhone can be the most troublesome device to set up, so don't feel bad if you don't get it the first time.
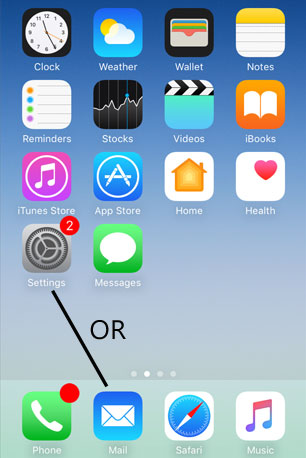
1. If this is the first account you're setting up on the iPhone or the iPod Touch, tap Mail.
Otherwise, from the Home screen choose Settings
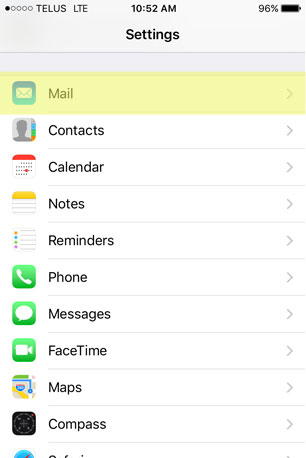
Select Mail, Contacts, Calendars
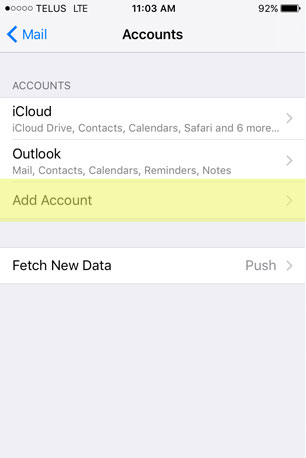
Select Accounts
Select Add Account
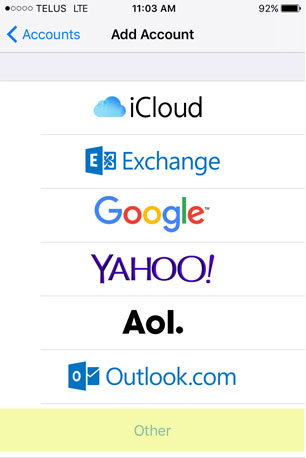
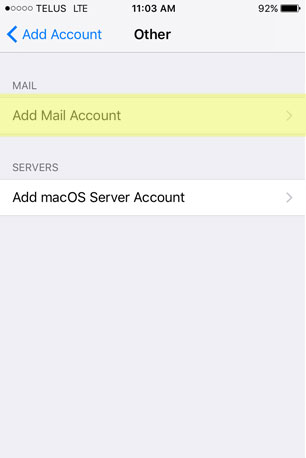
2. Choose Other as your e-mail account type:
3. Select Add Mail Account under the Mail section and enter account information.
Fill in your name and e-mail address. Then click Next.
.jpg)
4. On the next screen enter your account details, including the following.
Incoming Mail Server
Host Name: mail.inmca.com
User Name: username@domain-example.com (your full e-mail address)
Password: If you do not know your password, you can reset it through Mail Administration.
Outgoing Mail Server (SMTP)
Host Name: mail.inmca.com
User Name: username@domain.com (full e-mail address)
Password: If you do not know your password, you can reset it through Mail Administration.
Tap Next to save the entered information. Your iPhone will then verify your account information.
In the event you received a message that the mail server cannot be verified, select Accept. Repeat this for Incoming Mail server as well as Outgoing Mail Server.
TIP: If all else fails and you know the settings are set up right, save the setup information, leave the device for 30 minutes and try again.
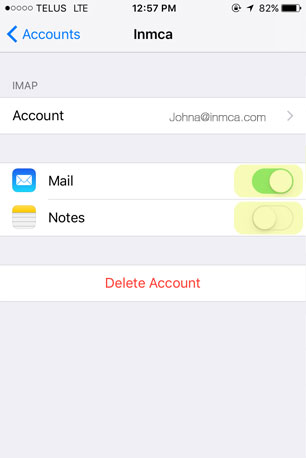
Select your newly created account and enter the Advanced section.

5. Your phone will take you to the next screen below. On that screen you can decide wether or not to have your notes linked to your email.
You can click where the yellow is highlighted to move the switch. Green means selected yes, and white means not selected. You can always go back later and decide.
6. Verify the Outgoing Server
If you don't set a user name and password for the outgoing email, you may get an error message: "Cannot Send Mail - ... The recipient was rejected by the server because it does not allow relaying"
1. Go to Settings -> Mail -> Accounts and Passwords and tap on your account.
2. Tap on "Account," then go down to the "Outgoing Mail Server" section and tap on "SMTP."
3. Tap on your Primary Server. (mail.inmca.com)
4. Even though it says "Optional," fill out both user name and password under Outgoing Mail Server.
- Host Name mail.inmca.com
- User Name <your email address>
- Use SSL ON
- Authentication Password
- Server Port 465 (preferred) or 587
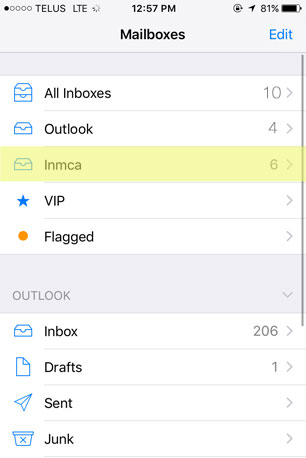
7. You can access your email 2 different ways.
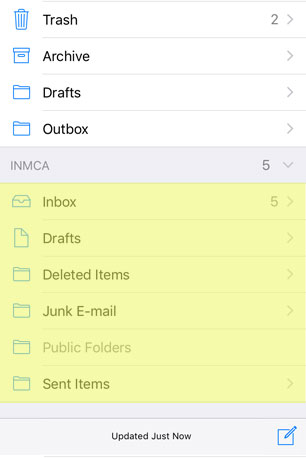
1. From your home screen, click your mail app. Once in the app you will see the first screen below. Click whichever email you like to enter and from their you can access your inbox. drafts, sent, and trash.
2. Select your mail app from your home scree, scroll down to the bottom and there you can access your inbox, drafts, sent, and trash.
You should now have a fully configured account on your Apple iPhone.