The Blog... Keeping your customers informed about whatever you want!
Creating a blog for your website is a fantastic way to enhance your site's value and its reach by:
- improving your site rankings,
- providing important product and industry news and information to customers and potential customers,
- keeping your site fresh,
- adding material to create a newsletter to engage with your customer,
- encouraging other sites to link to yours, increasing your perceived expertise and authority,
- giving you the ability to highlight keywords and phrases without blatant "keyword stuffing".
NOTE: You will only have this group of buttons IF you chose to add this on to your website contract.
If you don't have it but would like to implement it, just talk to us about adding it on.
Let's get started.
Here are the buttons related to the SiteBuilder Tools blogging system.

First, the 'edit blog' button.
This is where you create your content for each blog. When you choose this, you'll see all the blog/news you've started. (or it'll be empty, if this is the first one you've made)
You can choose the green 'add new' button at the top right to start a new blog.
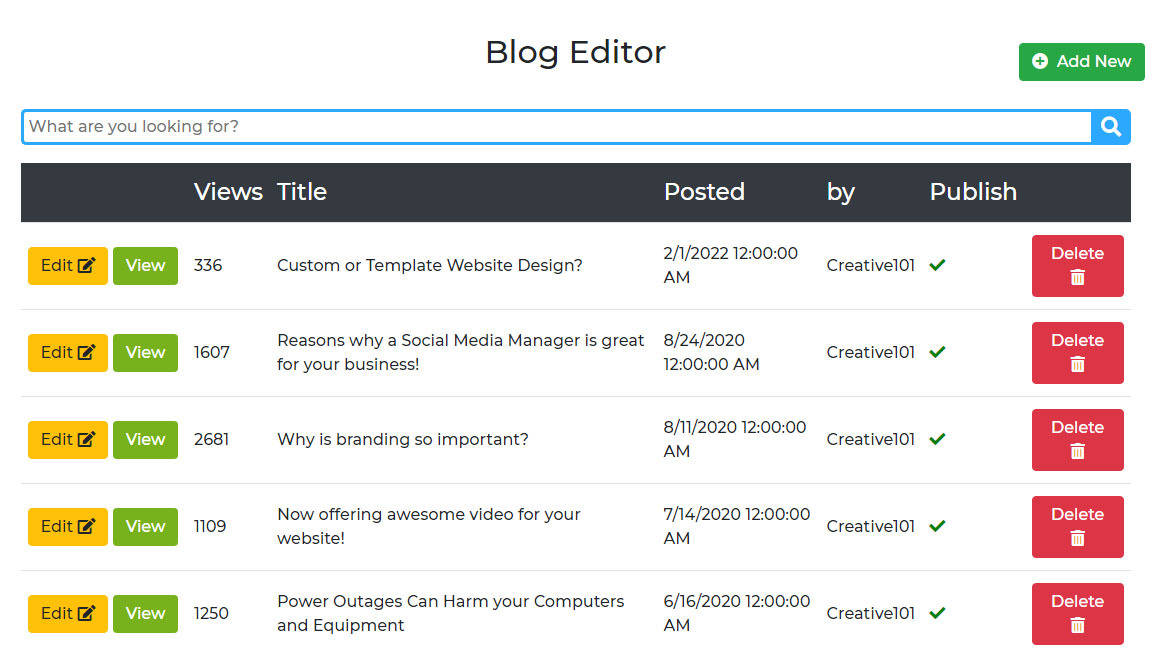
New blog entry. The 'add new' button will give you a pop up window to create a new blog.
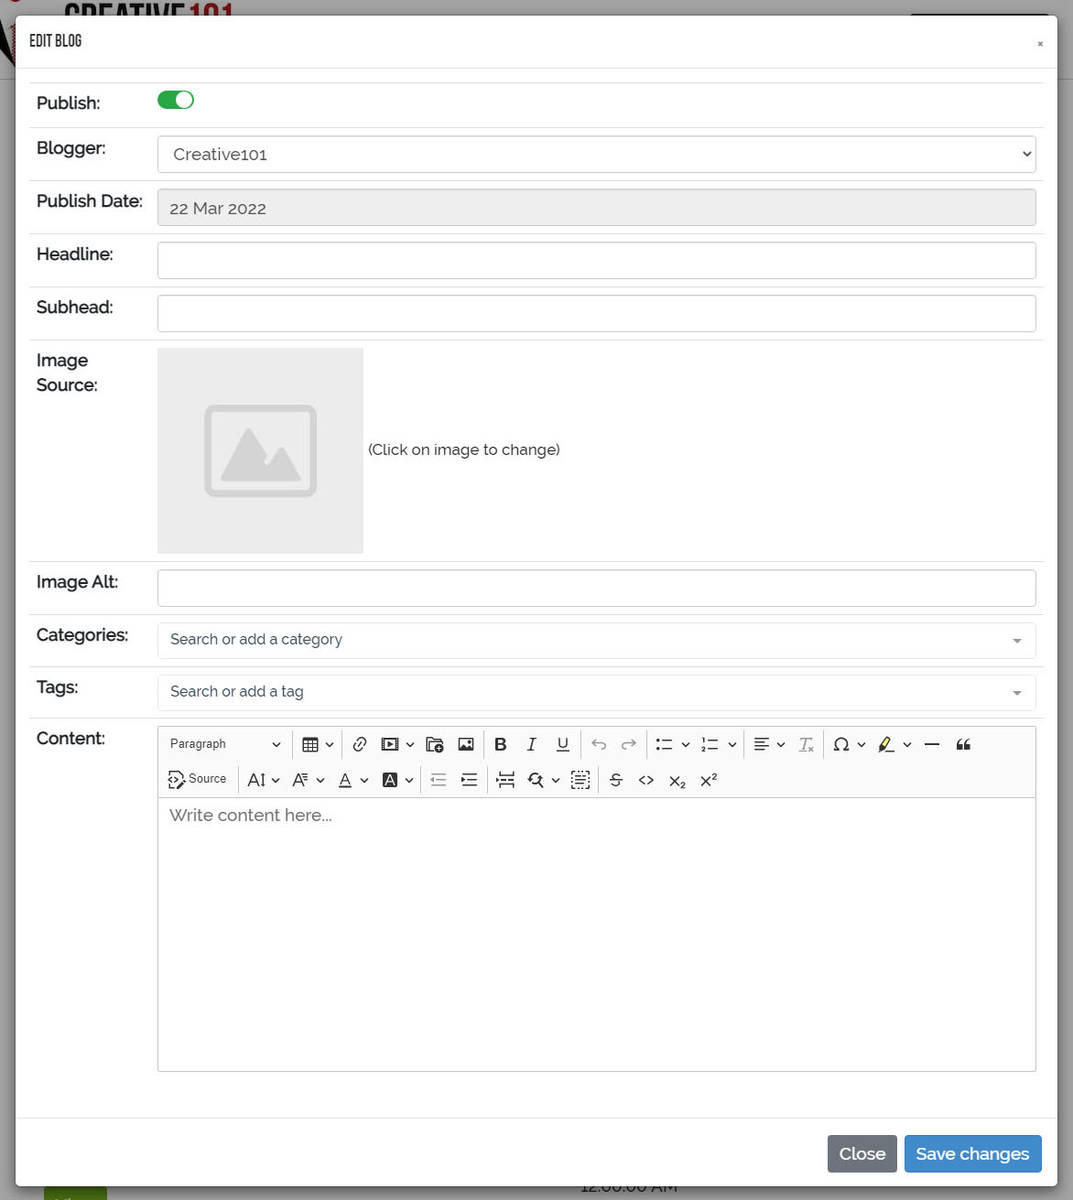
Publish: If you want to be able to save (do it often - blue button at the bottom) turn off the publish button until your entry is ready to show on your website.
Blogger: This is where the 'staff' or 'blogger' name comes into play. In most cases, this will be set up with your name or company name and info that will show at the bottom of any entry you make. If you want to allow others to add a blog to your site, you can set them up in the 'staff' section. Go back to the dashboard and choose the yellow 'staff' button to do this. You can learn more about this in the next section on this page.
Publish Date: You can change this by clicking on it and choosing a different date.
Headline: This is where you give your blog a name. Remember to choose good keywords but a good sentence, as well.
Subhead: Just another sentence about your blog.
Image Source: You can add an image that will appear on your blog/news page. A good size for this is 600 px x 600 px.
Image Alt: Always give your images a title. Include keywords while making a good sentence about the image.
Category: For each entry, it should have a category. You can set these up or just add as you create your blogs.
Tags: Another place for important keywords. Depending on what your blog is about, you can add words that people might be searching for.
Content: This is where you'll create your blog. Just like in other editing applications, you can use the menu to add interest to your news. Font enhancements, photos and links can be added here. NOTE: If you are importing text from a Word file or other application, right click and choose 'paste as plain text' first. If you just copy/paste from these apps, it may cause an error due to styling issues.
When you're done, click the blue 'save change' button.
Add a pdf to your blog: If you'd like to add a file, like a pdf to your blog, this is how you do it.
You can add a pdf link to text, for example, 'download the pdf'. Just set up your text and then click on the 'insert image or file' button like in the image below. Click on 'upload' in the new window. Find your pdf on your computer and choose 'open'. Once your pdf is uploaded you can close this window. Highlight the text you'd like to add the pdf link to and click the 'insert file' button again. Select your pdf and hit 'choose'. That's it! Don't forget to save your blog.

Edit an existing blog entry. Click on the yellow 'edit' button or the green 'view' button. The edit window will reveal the same pop up as a 'new' entry but of course, it will already have content in it. You can make your changes and remember to hit the 'save changes' button at the bottom. The view button will show you in a new window, how your blog will look.
The 'staff' button.
Clicking here brings you to this screen.

If you haven't set this up, it will not have any to show under the black bar. Click the green 'add new staff/blogger' button and the window below will appear.
The yellow 'edit' button is to edit an existing blogger.
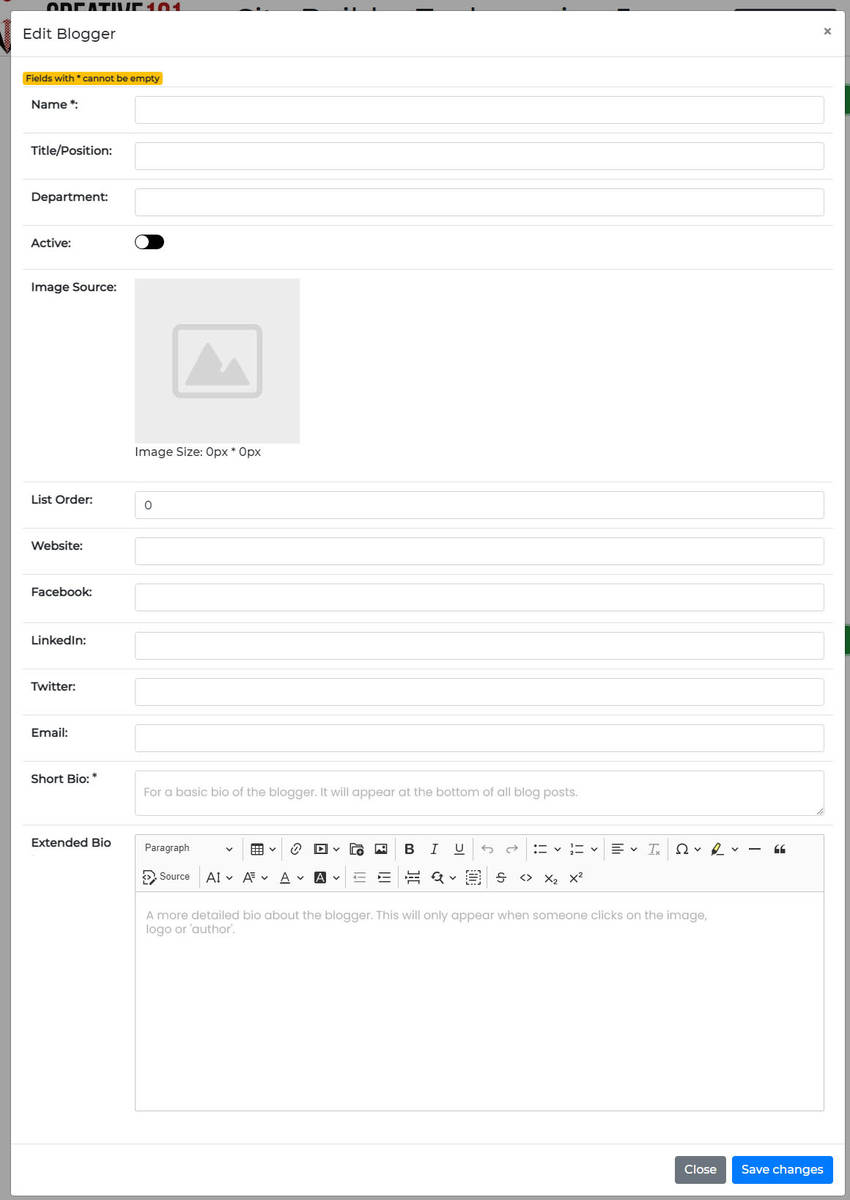
Not all fields are required, so you can decide what optional info you would like your profile to contain.
The 'image' area should be kept to approximately 255 px wide. You can put a photo or a logo into this box.
'List order' only applies when you have more than one blogger profile and only shows on your end, not to the public.
All the social fields are optional. They will appear if someone clicks on the image or logo to view the 'extended bio'. They will appear along the bottom of that section, when viewed.
The 'short bio' is where you put the basic details for the person or company that will be writting the blog. This info will appear beside the image or logo at the bottom of the blog article.
The 'extended bio' is used to include more detailed information about the blogger. This will only appear when someone clicks on the image, logo or 'author' and will also include the social links if you chose to supply them.
An example of how this will look at the bottom of each blog entry. It will show the category for that particular blog and the tags used, as well as the author 'short bio'.

Categories & Tags
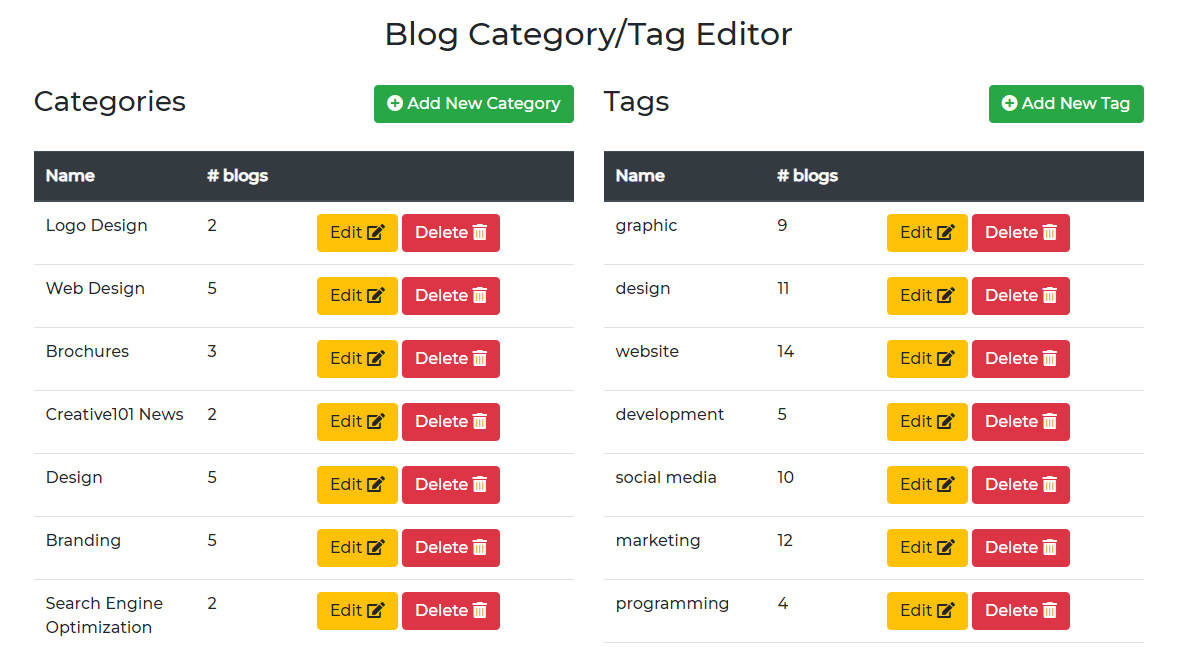
This is where you'll find all categories and tags that were used in any blog that was written on your website. Of course, if you're just starting, it will be blank.
You can delete or change any of them, from here. You can also set some up, too! However, you can do this when you are writing a blog, as well.
Subscribers
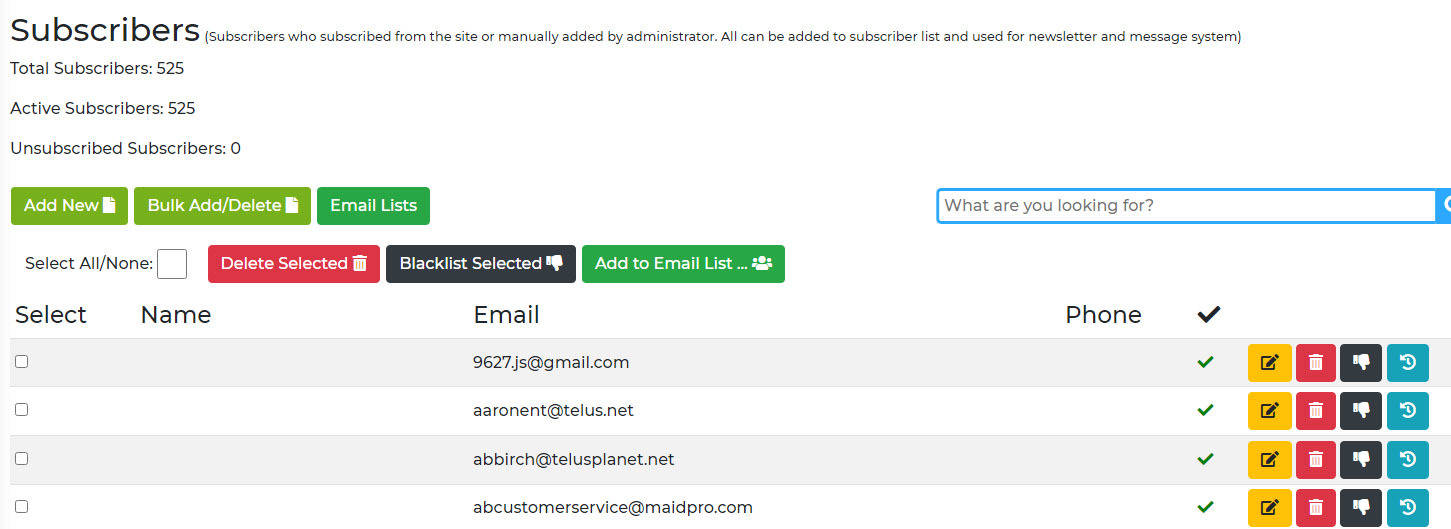
If you opt to have the blog add on for your website, you will also have a place for people to sign up to receive a newsletter. Once you have subscribers, they can be informed of your published articles. It lists how many are subscribed, who has unsubscribed and you can delete any that you don't want on the list (spam, for instance).
You can also set up 'lists' if you have a different bunch of people you send different blogs to.
Newsletters
This is a great way to let your subscribers know about any new blog you publish on your site. Essentially, it's an email that goes to anyone who subcribed.
Choose the yellow 'create newsletter' button from the dashboard to start.

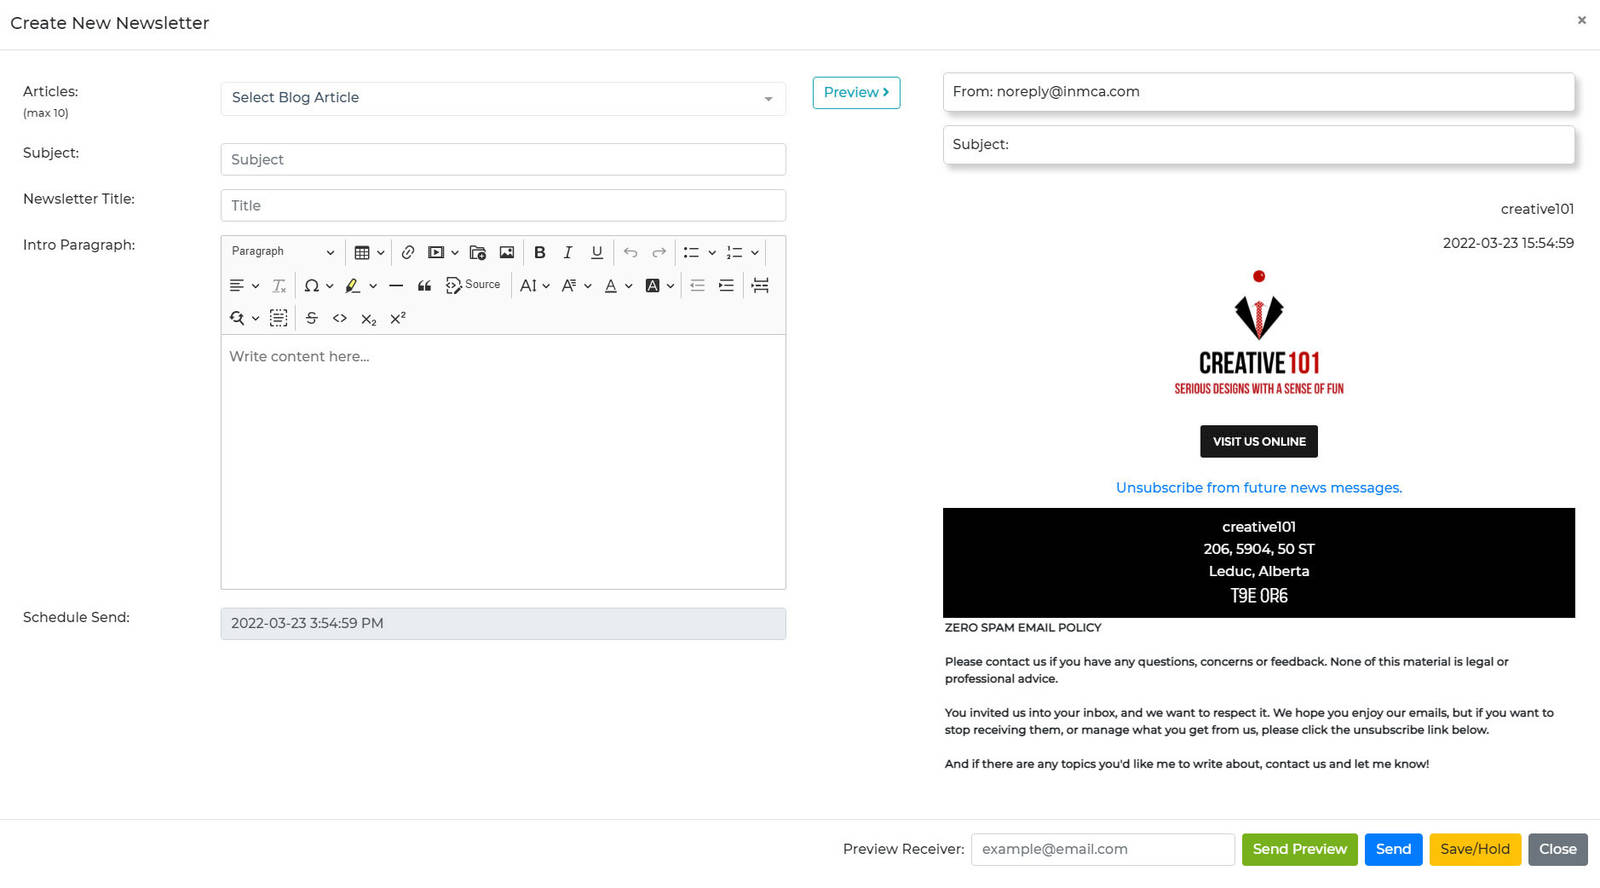
From this editor, you can create a 'new newsletter' or edit any that have already been sent. This pop up will allow you to create an email that will be sent to the subscribers you choose.
From the panel on the right, select the blog you want to send info about, enter a subject and a title, then create your message similar to any other editor. The panel on the left will preview your message when you click the 'preview' button. Your specific footer and info will already be set up by us to appear on all newsletters.
When you have finished your message, you can enter your email in the field at the bottom right and choose the green 'send preview' button. This will send ONLY YOU a copy of your newsletter so you can ensure that it will look the way you want it to.
The yellow 'save/hold' button should be used OFTEN during your message creation, to save your changes. The blue 'send' button is to actually send the message to all subscribers when you are sure it's good to go.
If you'd like to schedule the email to send out on a certain day and time, you can click on date/time bar directly under the content area on the left. If you have chosen a day in the future, when you hit 'send' it will ask you if you want to send 'now' or when it was scheduled.
