Working with Galleries on Your Website Using SiteBuilder Tools
This dashboard button links to the Gallery editor of your website. By clicking the icon, you can add, edit, or delete images on your Gallery page.

When you click on this, you can access the various galleries you may have on your site.

Lets have a closer look at each field:
Group: You can organize your galleries into groups by assigning different names in this field.
Gallery name: This is the unique name for each gallery. Choose titles wisely as they will have SEO impact. If you click on this title, it will just preview your gallery.
Subtitle: Not every image demands a subtitle but if yours do, this is where you add it.
Active: This box reveals whether the gallery is displayed or hidden.
Number of images: This just shows you how many images your gallery has.
Order: By applying a number to this field, it places the gallery in the specific order you wish it to be in. It is a good idea not to use 1, 2, 3, 4 etc. but 10, 20, 30, 40 and so forth so that if you want to squeeze an image between two others, say between pics #40 and #50, you can simply call it #45 without having to change all the other numbers as you would in a single digit numbering scheme.
Delete: Obviously, if you want to delete the specific gallery, you do so here. However, it will be gone so be sure.
Gallery settings: This is THE button you'll be using the most. It contains the content for each gallery.
Files: This is the image (s) for the gallery.
To edit an existing gallery: choose the 'properties' link. This pop up will appear and this is where you'll be spending most of your time.
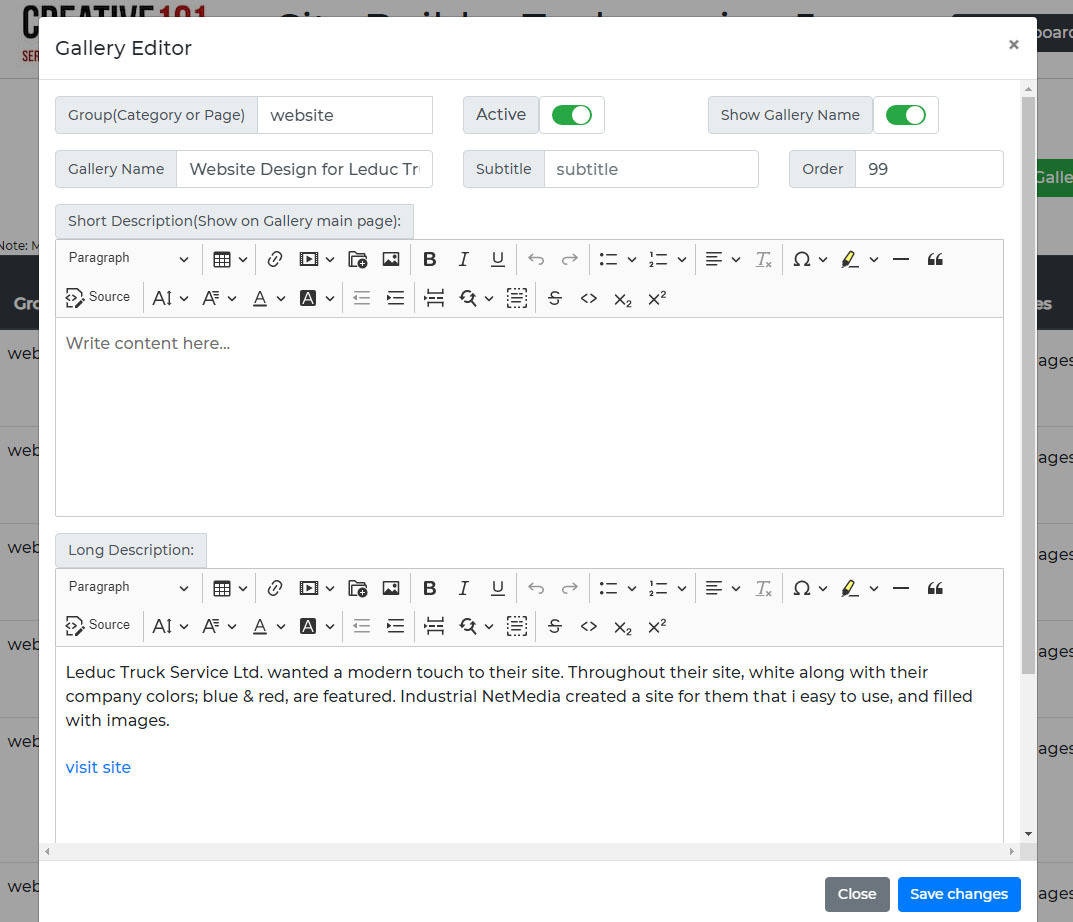
You'll notice that most of the fields we just spoke about are edited within this box. Fill out the fields (subtitle is optional) and check the active box. Place the content under 'long description'. The 'short description' is only used on some websites. When changes are done, click the blue 'save changes' button.
The gallery editor icons
To add a pdf: you will need either text (ei: download your pdf) or a button/box to link your pdf to. 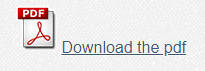 for example. Add that to the long description in the editor. (You can find this useable pdf image online)
Select the image or text you'd like to link the pdf to. Choose the 'insert image or file' icon (circled in red). Choose 'upload' and locate your pdf on your computer and choose 'open'. Once your pdf is uploaded, double click on it. This should bring you back to your linked image or text with the path linked to the new pdf. Choose 'SAVE CHANGES' to complete.
![]()

These three icons are for:
The first icon is to add a table. Follow the instructions when you click to add this.
The second icon is for a link. You hightlight what you want to add a link for and then click on this icon. You can enter a URL or an internal link.
The third icon is for images. Just click where you want to add the image, then click on this icon. Follow the instructions to complete.
The next bunch of icons are for text formatting. They should be self explanatory but if you need help, give us a call.
Back to the main gallery screen:
To add a new gallery: choose the green 'add new gallery' at the top right of the main gallery page (see first image). After you do this, the same pop up used in the editing step, will appear. Fill out the details and hit save.
To edit the image(s) for your gallery: choose the 'images' link. This pop up will appear.
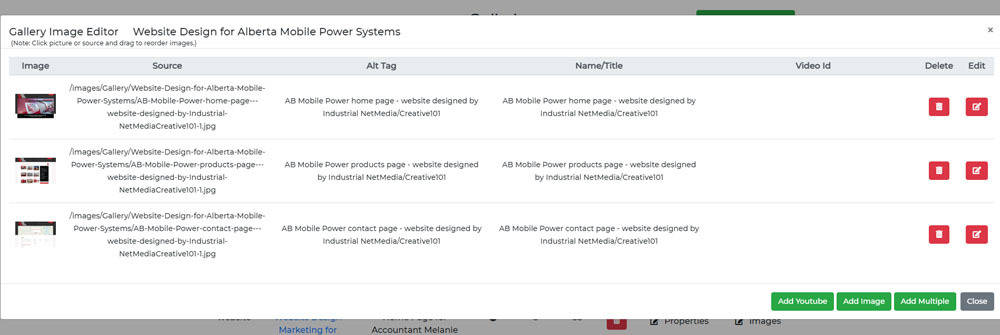
Image: shows a thumbnail of each picture.
Source: means the path to the folder where that image lives.
These fields, 'Alt Tag' and 'name/title' are editable* (see below) fields to include key words for SEO, to your image. (Click this link for a more detailed explanation of the proper care and use of Alt and heading tags.)
You can delete an image by clicking on the little red 'garbage can' icon.
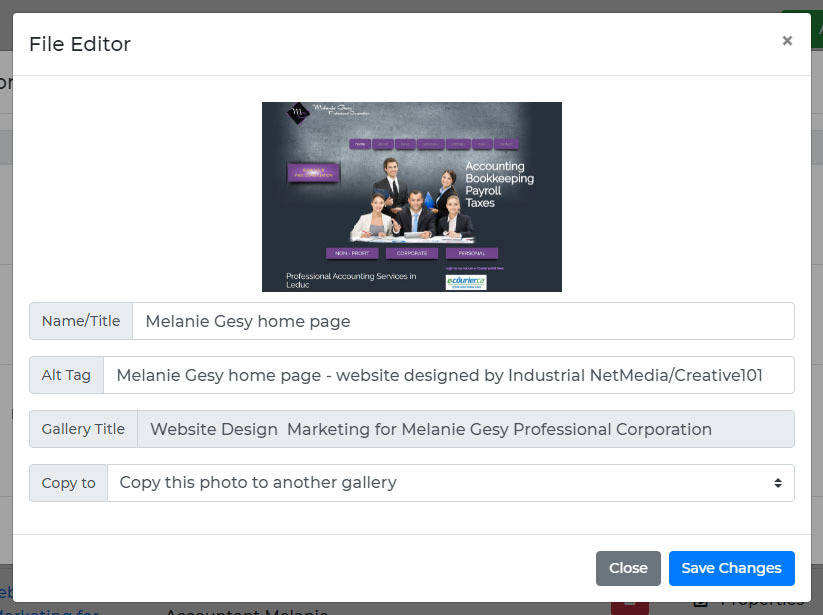
*To edit these fields, you choose the red 'pencil in box' icon at the far right. A pop up (see image below) will reveal all the editable areas.
When your finished with your changes, you can hit the blue 'save changes' button.
 These green buttons are to add images and video to your gallery.
To add new images: click on the 'add image' or 'add multiple' to see a pop up of files. You will navigate to YOUR folder on your computer that has the images in it you want to add to the gallery. Then you can choose the ones you want and hit 'open'. You will see that it has added your new image(s) to the pop up for images. It will auto generate the 'source' and 'title' but if you want to change those, you can click the red 'edit' button to edit the info. When you're done with the images, you can just click the grey 'close' button. This will bring you back to the main gallery that shows them all. If you're done, you can choose 'dashboard' or 'back to website' to close this window.
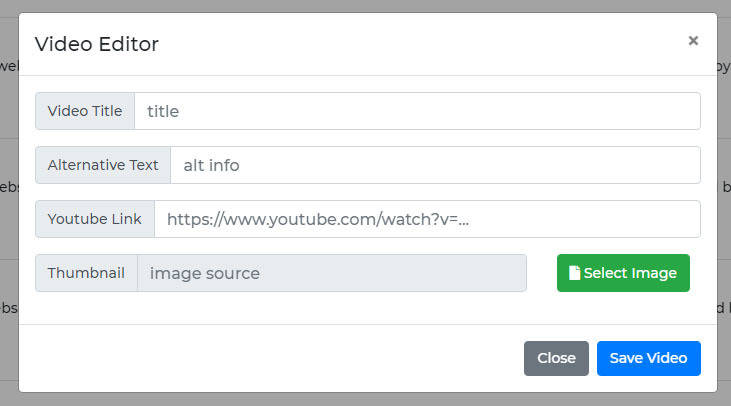
To add a video: click on the 'add youtube' to see a pop up similar to the add images one. You can give it a title, alt tag and then enter the link to your video on youtube. You can also add an image to show on your page by clicking on the green 'select image'. When you're done, choose the blue 'save video' button.
Have fun!