Uploading Photos to Your Gallery
Once you have set up your gallery via the "Edit Gallery" button on the Dashboard, you will get a screen that resembles the one below.
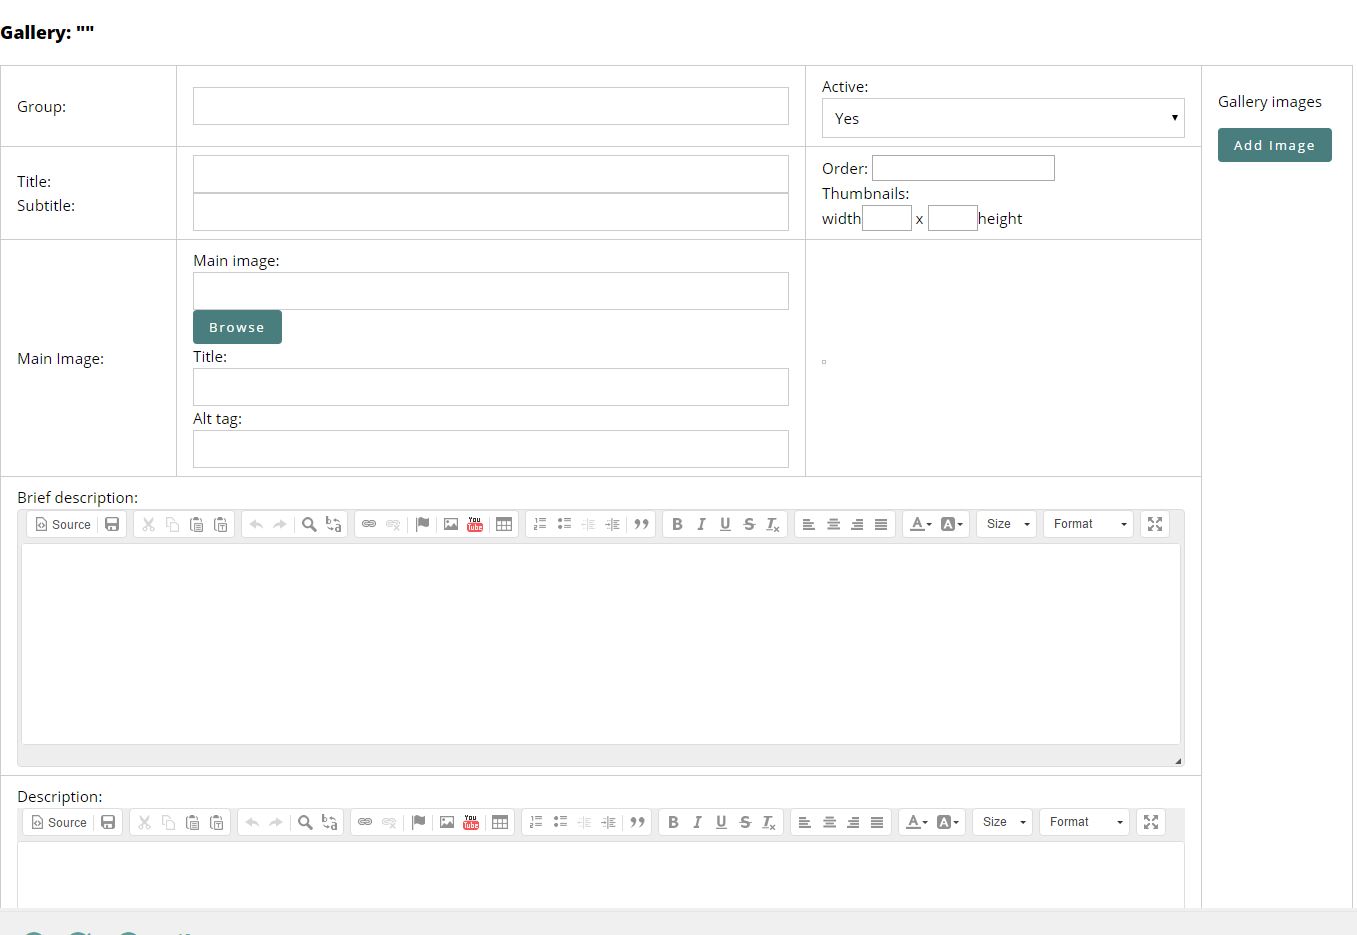
Now you can upload a Main Image by selecting the prominent "BROWSE" button as pictured above. By clicking this button, you will get a popup window that looks like this:
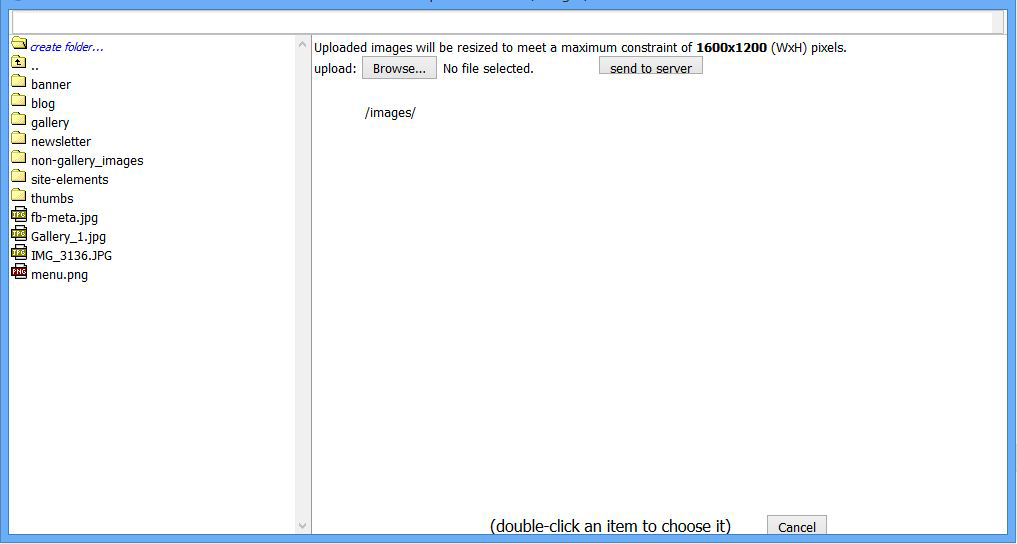
How Photo Files on Your Computer Become Pictures on Your Website
To keep the files tidy, click on the "create folder" button on the top left and type in the word "gallery" where indicated. Once you have a folder on the uploader named "gallery" as shown above, click it to recreate the uploader window. Now you can click this new "BROWSE" button which should take you to your computer's hardrive where you can select the desired photo file from the folder they are stored in. Double-click the Jpeg file you wish to upload and the name of the file will appear on the uploader window. Then select the "send to server" button which will add the file to the INM servers where your website actually lives. Your selection will appear on the left. Double-click the file name that appeared on the left and it will create another pop-up window that look like this:
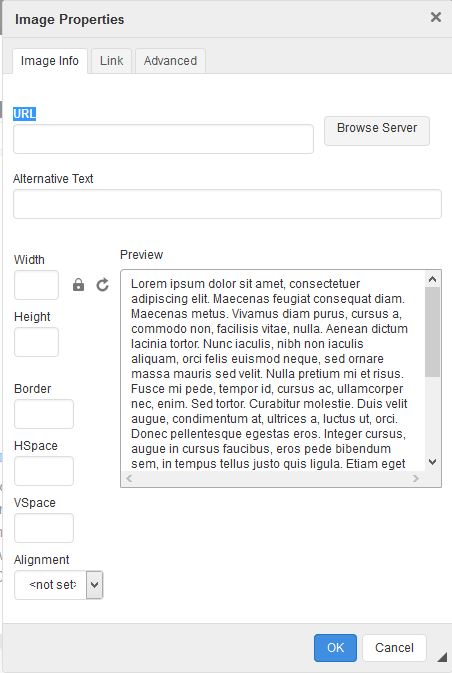 It's All About Property Values
In this window you can change properties of the picture, as well as add an Alt title, which is the description of the image for the SEO-bots since they cannot "see" actual images.
Try and use the same dimensions as the source photo although there is an image modification tool which is available on the dashboard page. Instructions for the image modification tool can be found here.
You can also manipulate the picture by clicking the lock icon which allows you to change the width and height values without affecting the vlue you are not changing. Thus, you can stretch a picture to be wider without making it taller. This may cause image distortion, hhowever, which can be monitored in the preview window,.
In the "Border" field, you can choose whether to have a frame around your picture, add colour to the frame and choose a thickness (in pixels) for the border.
HSpace allows you to create a space between your image and other content so it doesn't look crowded on the horizontal plane. The value is in pixel-widths.
VSpace allows you to create a space between your image and other content so it doesn't look crowded on the vertical plane. The value is in pixel-widths.
Alignment allows you to select which side of the page you want your photo to appear on and will provide space for text to "wrap around" your photo as this text does. Not setting the alignment will force new content below the picture instead of beside it.
REMEMBER: If you don't like the result you see after you click OK to post your picture, you can easily right-click your mouse and select "image properties" in the dropdown menu to return to this field to make whatever corrections you wish to make.
Connecting to the Missing Link
After you have completed the fields in the Image Uploader window, you can make your main image become a link to another page within your site or to any website address (URL) you care to use. Just click the "Link" button at the top of the Image Properties window. This will call up another window; one that looks like this one, which we used the alignment setting to push to the right. ------>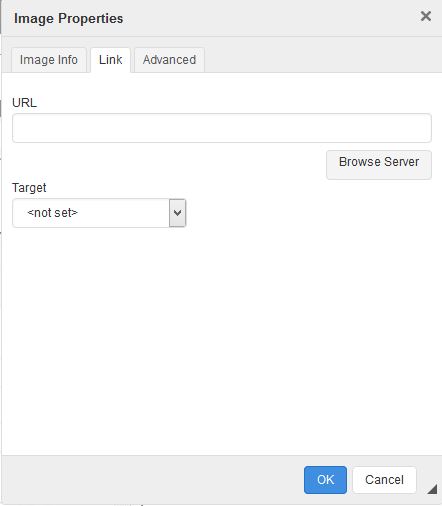
Simply copy the website address of the destination you want and paste it in the "URL" field. If you don't use the "Target" field, the link will take you immediately to the web page you pasted in the URL window. If, however, you choose "New Window (blank)", site visitors who click your link will get a pop-up of the linked page without leaving your website to view it. This is a very important distinction as keeping visitors engaged with your site as long as possible is usually a vital goal and transporting them off your pages to another site is not conducive to accomplishing this objective.
The Secret of he "Advanced" Window
For the vast majority of INM clients, there will not be any need to access this field but is there for web designers armed with special knowledge regarding site design. For those people that might need
Moving Pictures
Once you have the Main Image uploaded, now you can add more images to your gallery by clicking the "Add Image" button on the right side of the screen. Choosing that button will produce another field complete with a "Browse" button to click to access your image files on your hard drive. Follow the same steps you used to upload your Main Image. You can change the order of the additional pictures simply by dragging them up or down the list of added images.